How to implement Micro-frontends using Qiankun?
Micro-Frontends
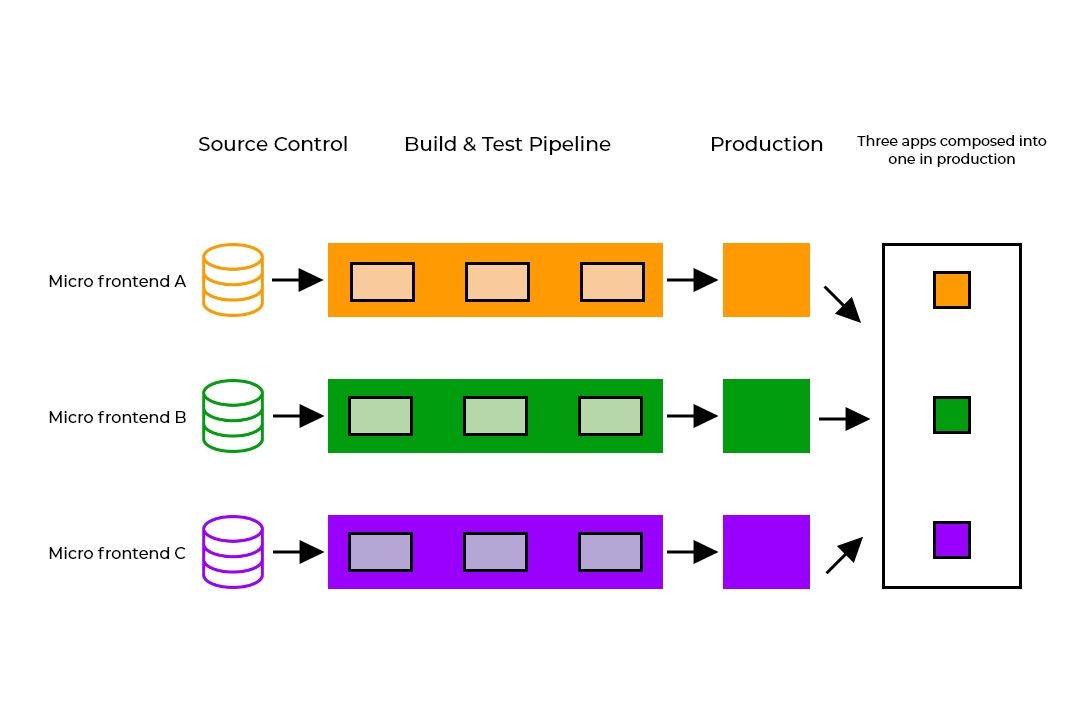
Micro-frontends extend the concepts of micro services to the frontend world. The current trend is to build feature-rich and powerful browser applications/single page apps, which sit on top of micro service architecture. Over time the frontend layer, often developed by a separate team, grows and gets more difficult to maintain.
The idea behind Micro-frontends is to think about a website or web app as a composition of features that are owned by independent teams.
Why to use Micro-frontends?
The Micro-Frontends architecture was introduced to solve multiple issues with the current SPA frontend development. Over time a website may become tough to scale, modify, or even train new engineers to be part of it. With such a monolithic system, developers will be blocked on each other just to apply a small change. In these cases, it is a better idea to adopt micro-frontends architecture.
Some Best Available Micro-Frontend Frameworks: -
There are some good micro frontend frameworks that you can use. Below are some of them.
- Qiankun
- Bit
- Single-Spa
- SystemJs
- Piral
- Luigi
Here, we are going with Qiankun, as Qiankun hatched from Ant Financial’s unified front-end platform for cloud products based on micro-frontends architecture. After full testing and polishing of a number of online applications, they extracted its micro-frontends kernel and open-sourced it.
At present, Qiankun has served more than 200 online applications inside Ant and it is trustworthy in terms of ease of use and completeness.
What is Qiankun?
Qiankun is an implementation of Micro Frontends, which is based on single-spa. It aims to build a production-ready microfront-end architecture system.
It seeks to address some of the main challenges that developers face when composing an application using smaller independent applications. By addressing the issues of component integration and publishing static resources, it ensures that these sub-applications remain independent during the entire process, right from development to deployment and up until runtime.
Micro frontends setup using Qiankun:-
Approach: We are going to create 3 React applications:
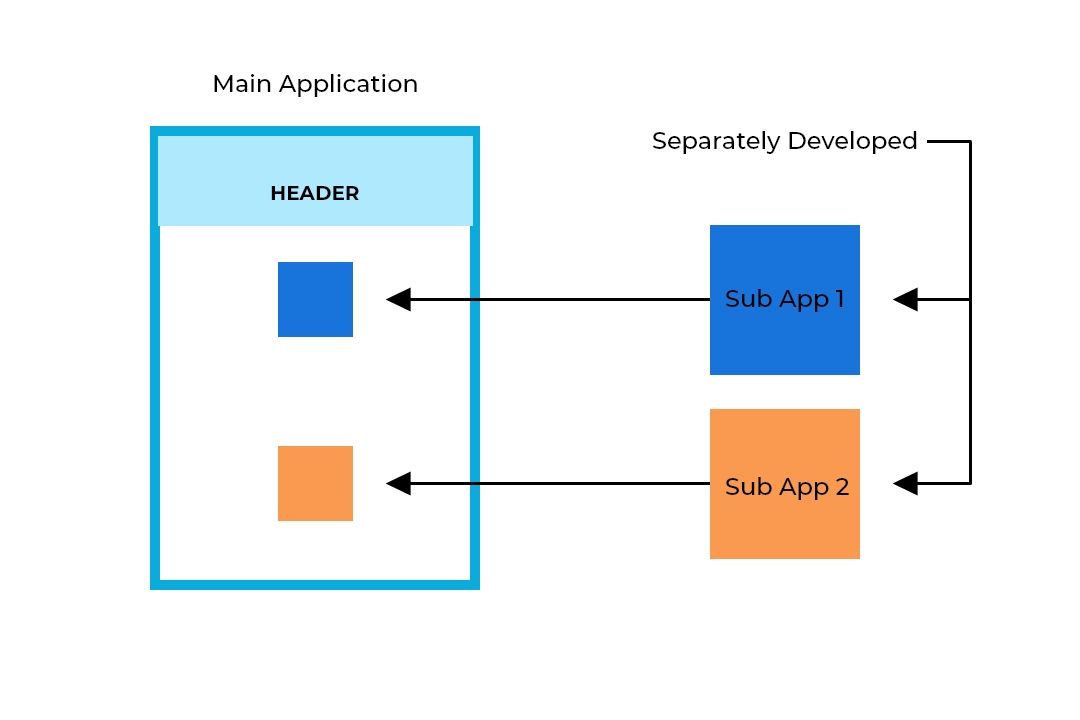
- Main App -> Acts as Container/Parent Application
- Sub-app 1 -> First Child Application
- Sub-app 2 -> Second Child Application
Here we can maintain our repositories in two ways. We can maintain all three apps in a single repository or we can maintain separate repositories for each app.
We are going to have three separate repositories for each app.
The main app contains a header section that contains nav links so that when we click on the links respective Sub apps will be displayed.
Note: Only the Main app needs the Qiankun dependency and sub-apps will be managed by lifecycle hooks/functions provided by Qiankun.
Step 1: Create a Main app using create-react-app (name: main-react-app).
Sub applications Configurations: -
Step 2: Now Create two react sub-apps using create-react-app. (Name: - micro-react1, Name: - micro-react2)
Step 3: Now let's set up the sub-apps.
In sup apps, we don’t need to install any dependencies of Qiankun.
There will be three lifecycle hooks/functions bootstrap, mount, and unmount which need to be exported from each sub-app's main entry js; in our case, it’s the index.js file.

Step 4: public-path.js Creation
Create a public-path.js file in the src folder which will be used to modify the runtime public path.
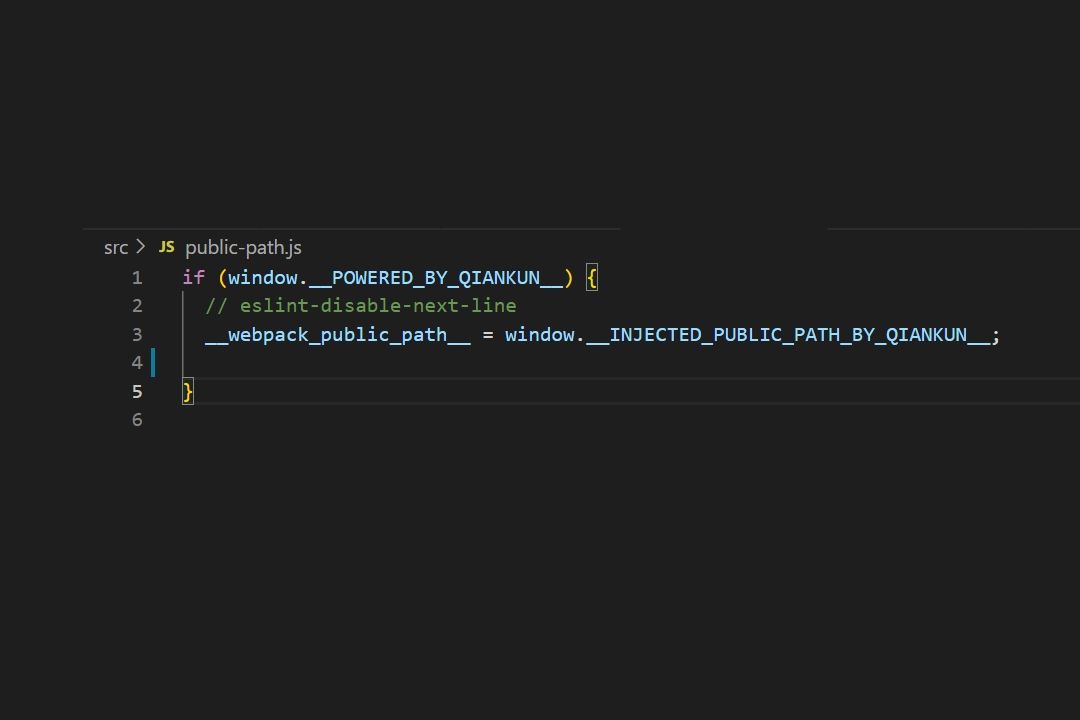
Now import this public-patch.js in the index.js file.
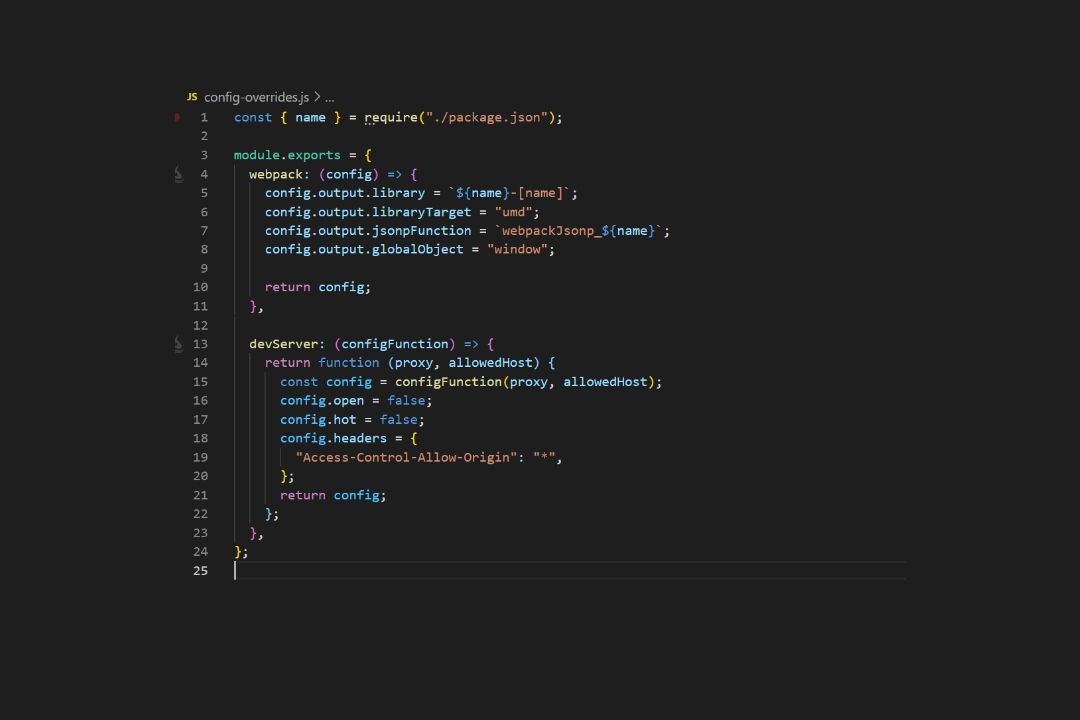
Step 5: Webpack configuration
As the Main application and Sub applications will run on different ports, as part of the browser security browser won't allow to access one port from another port. For that, we need to override the dev server configuration.
Using react-app-rewired plugin. (You can use alternatives like @rescripts/cli)
Install the plugin: - npm i react-app-rewired
Now create a config-overrides.js file in the root directory with the below configuration.
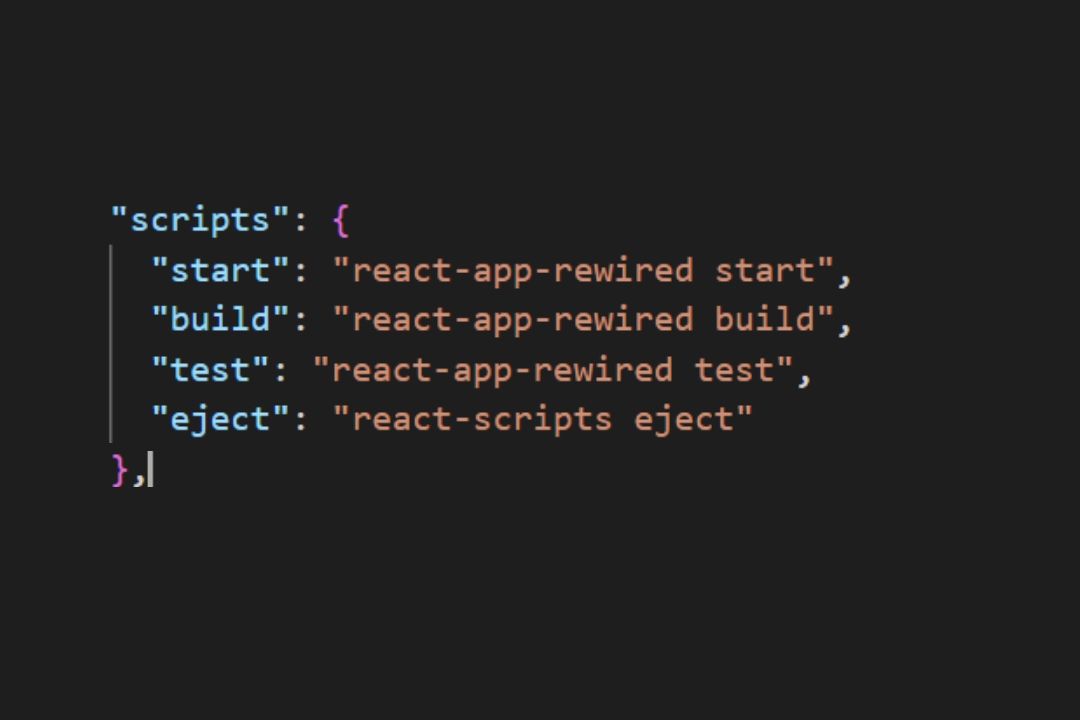
Modify package.json:-
- "start": "react-scripts start",
+ "start": "react-app-rewired start",
- "build": "react-scripts build",
+ "build": "react-app-rewired build",
- "test": "react-scripts test",
+ "test": "react-app-rewired test",
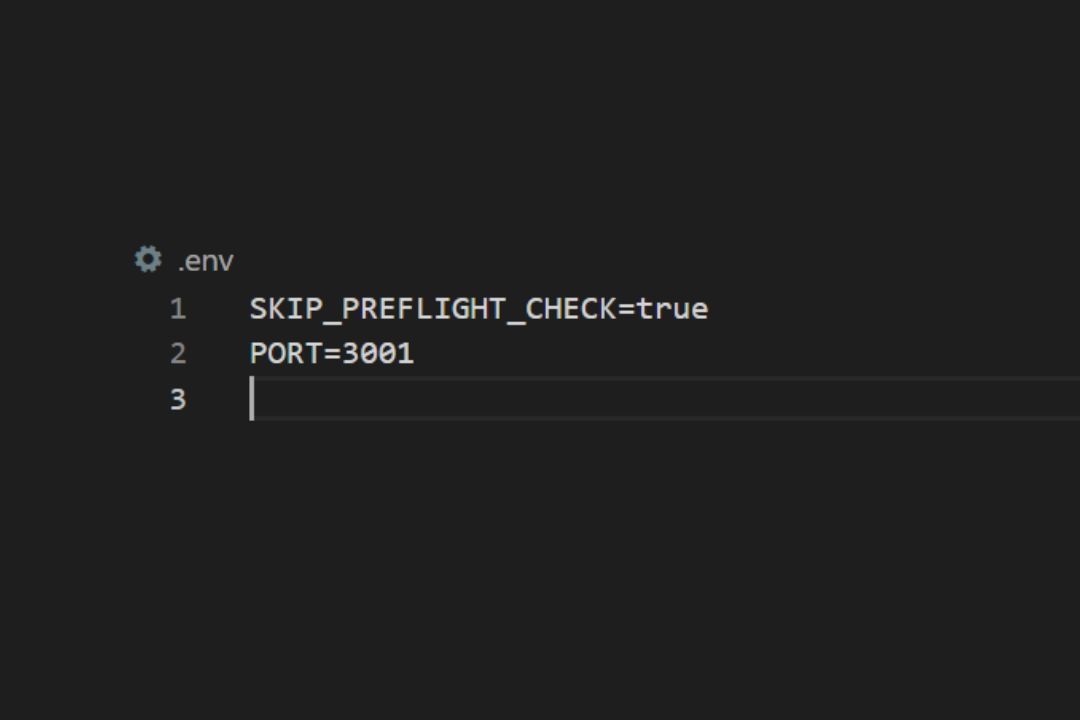
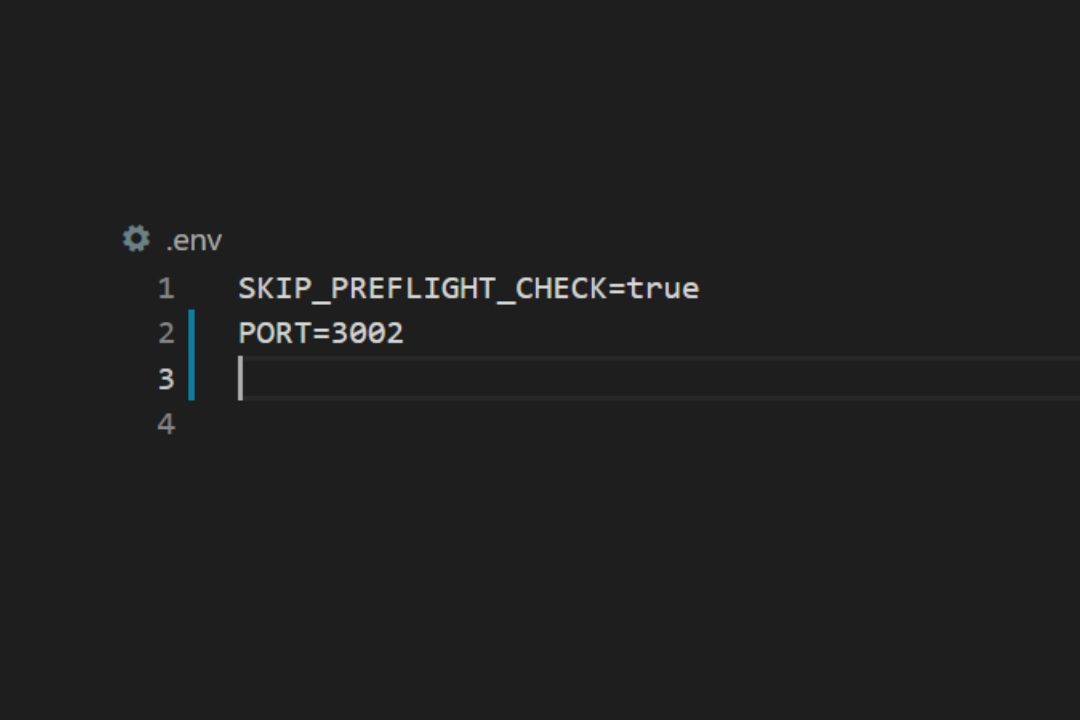
Step 6: Create a .env file for each sub-app and provide a port number to run on the particular port.
.env for sub app 1: -
.env for sub app 2: -
So now the apps will start on the below ports.
- Sub-app1 -> http://localhost:3001
- Sub-app2 -> http://localhost:3002
Main application Configuration: -
Step 7: Now we need to connect these sub-apps to the main app.
Let's make the main app run on port 3000 (you can use any port).
Install and import the below methods from qiankun in index.js of the main app.
Install qiankun: - npm i qiankun -S
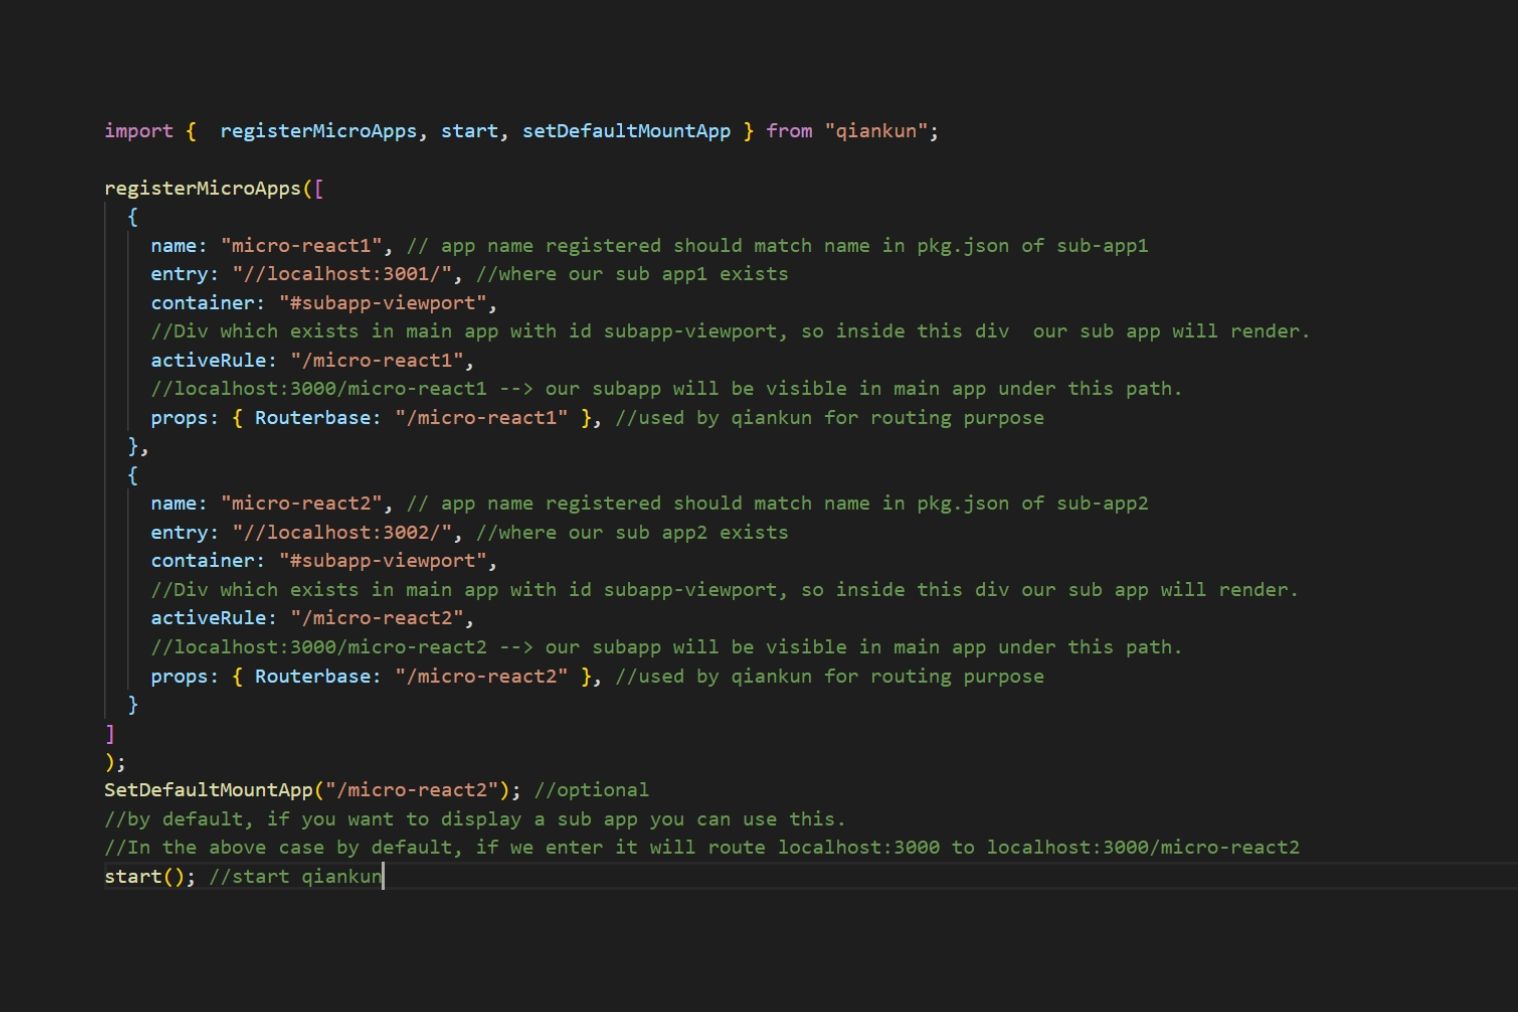
import {registerMicroApps,start,setDefaultMountApp} from "qiankun";
Now register sub app using registerMicroApps in index.js of main-application.
Now let's check how it's working.
Create a header with to Links in main app and a div to render sub apps.
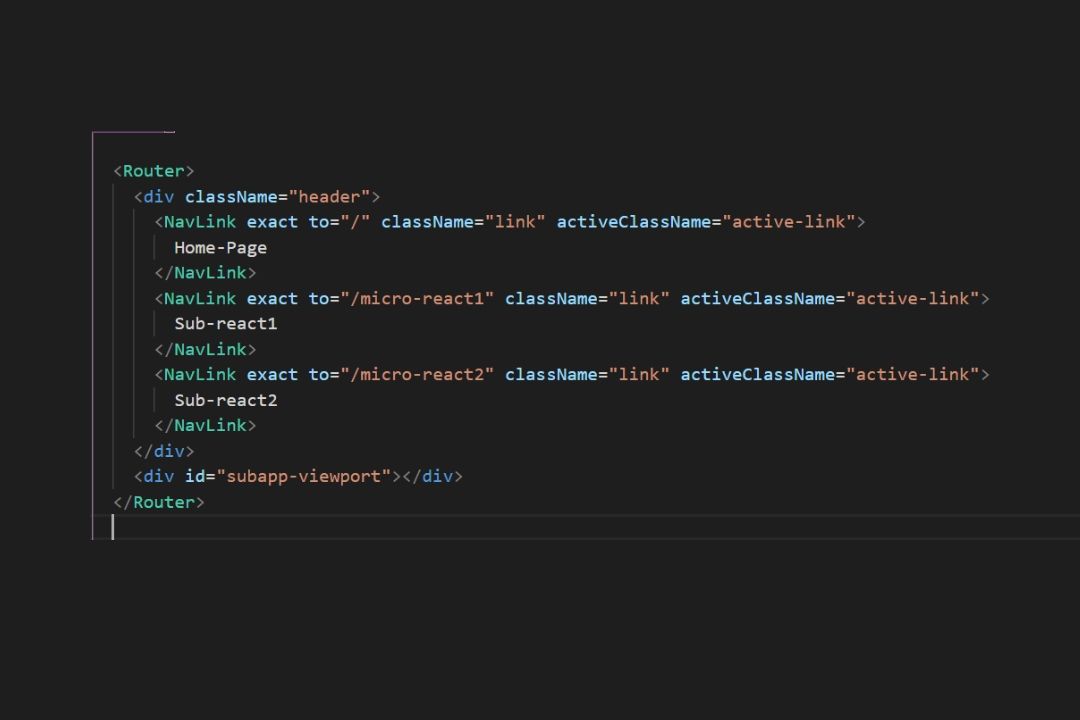
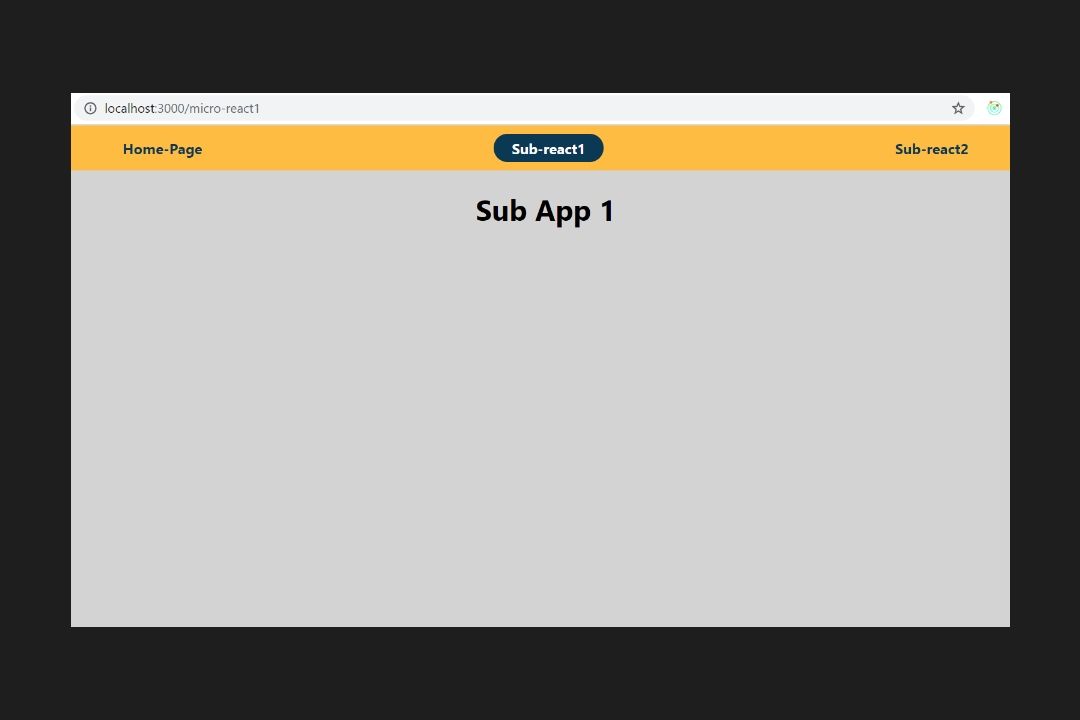
So, now when we click on the links, inside the div with id "subapp-viewport" we can see respective sub apps.
Have a look on below images of the app which we created.
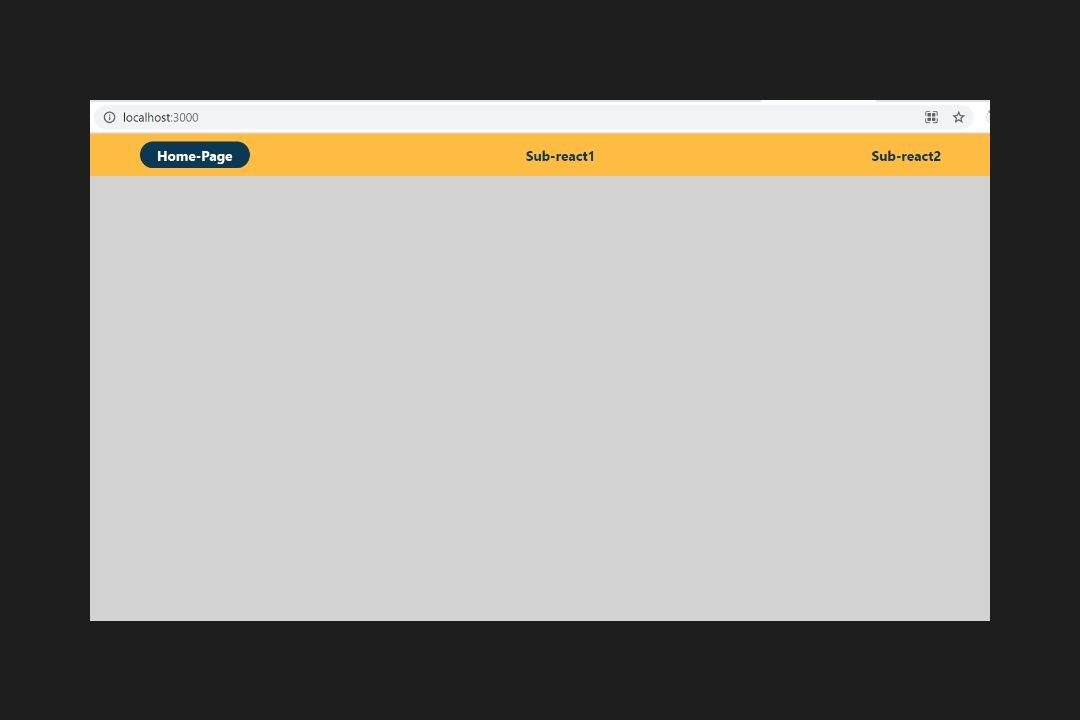
We have given grey color to "subapp-viewport" div. So, inside this grey colored div sub apps will render.
Main-react-app running on port 3000
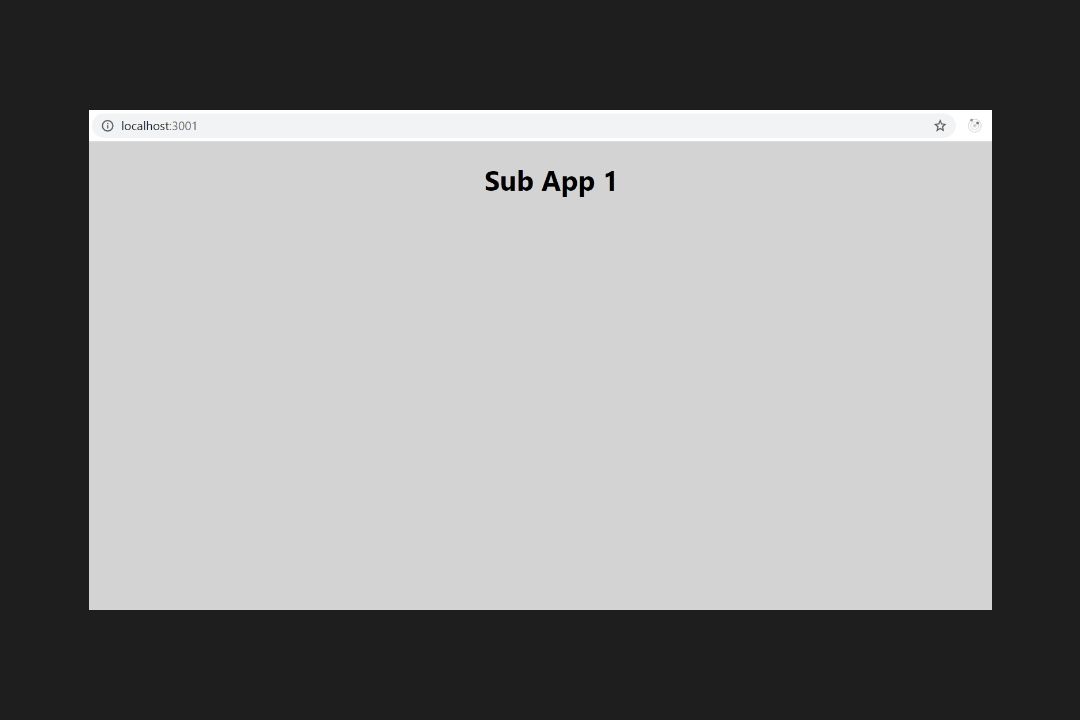
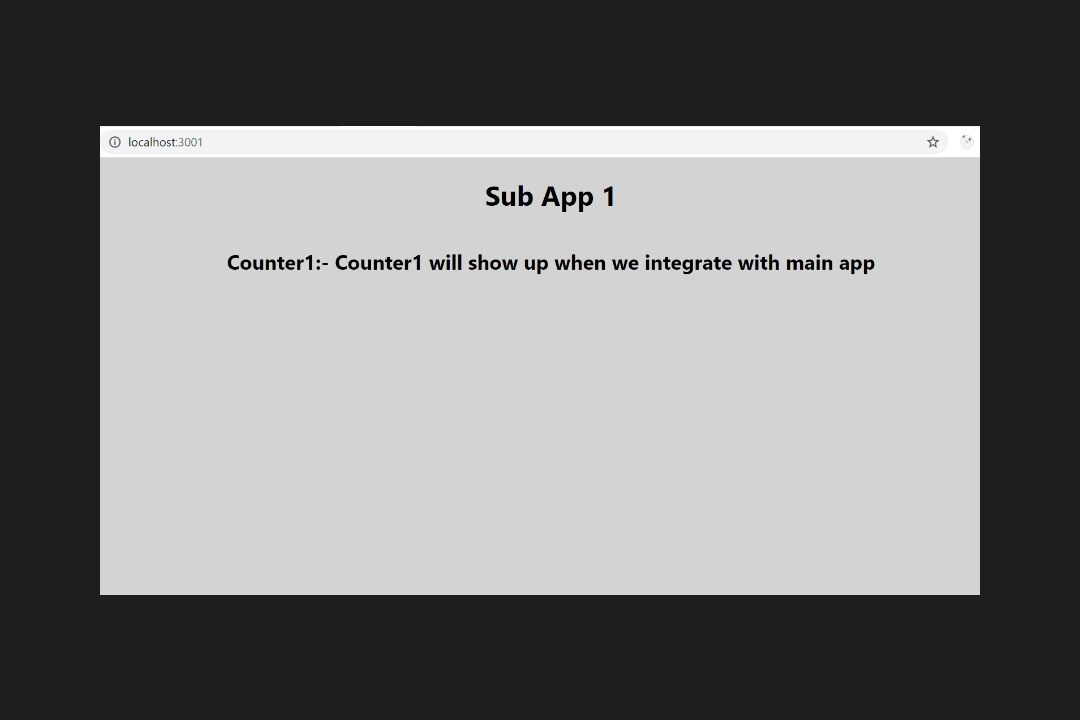
Sub App 1 running on port 3001
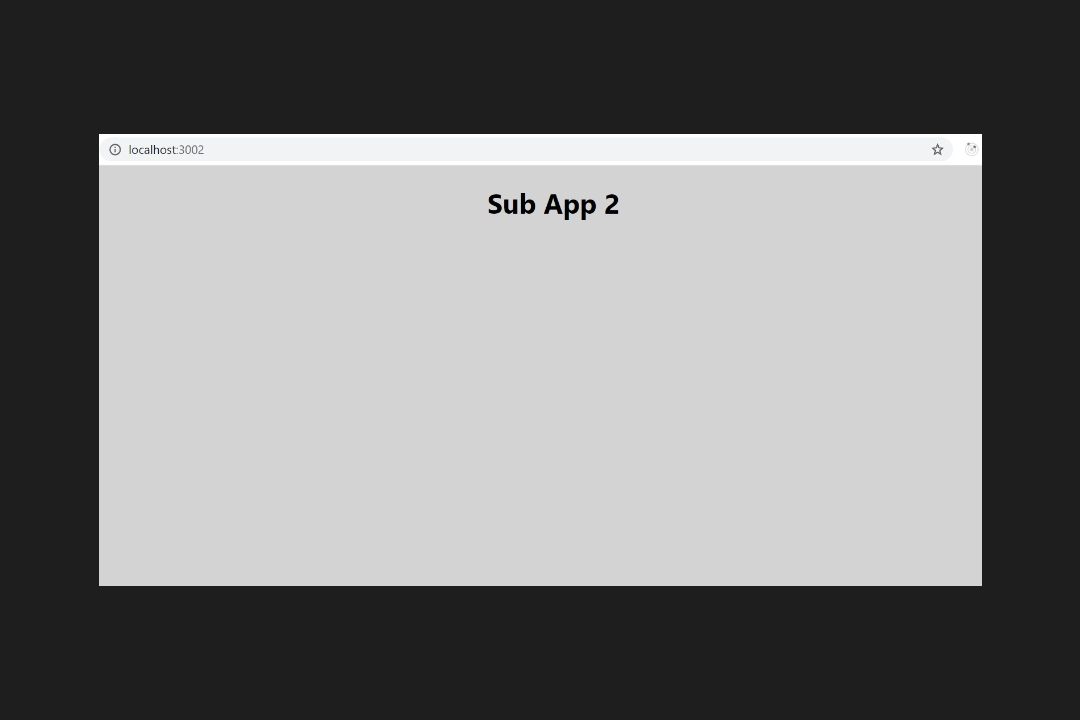
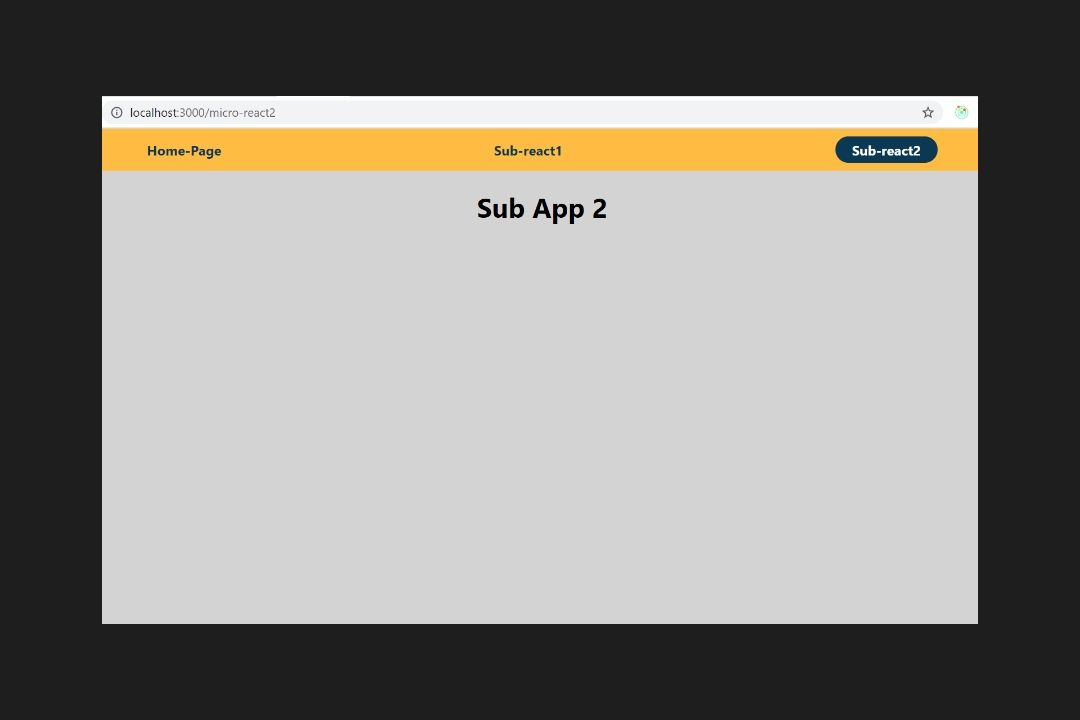
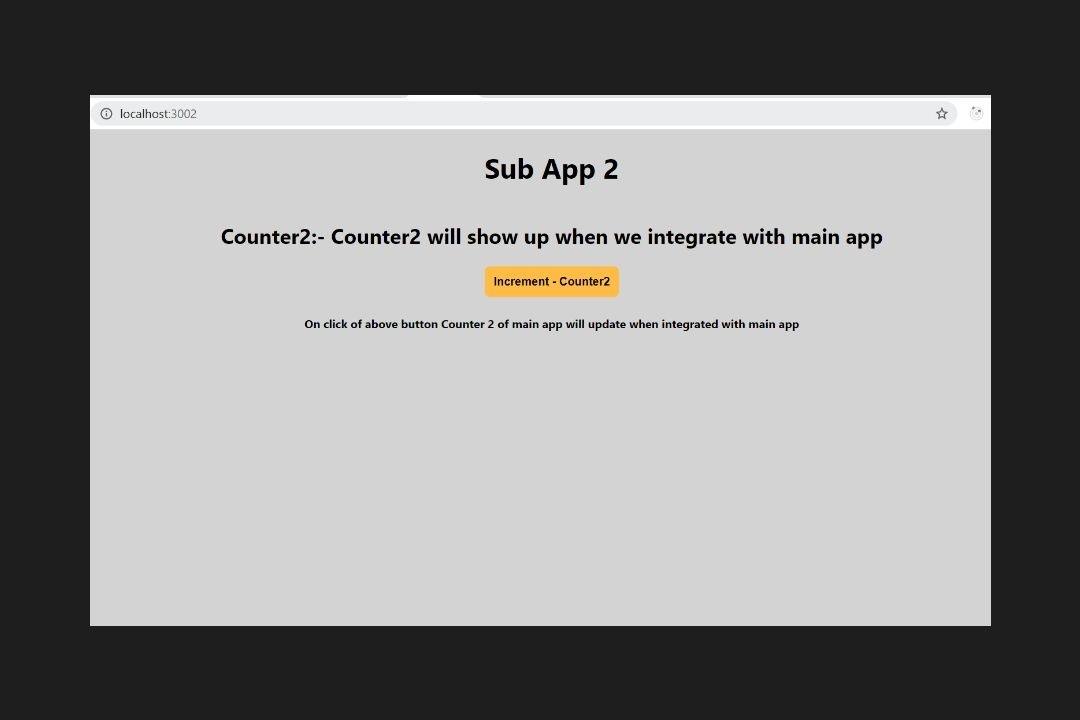
Sub App 2 running on port 3002
Sub app 1 integrated into Main app, when we click on Sub-react1 link.
Sub app 2 integrated into Main app, when we click on Sub-react2 link.
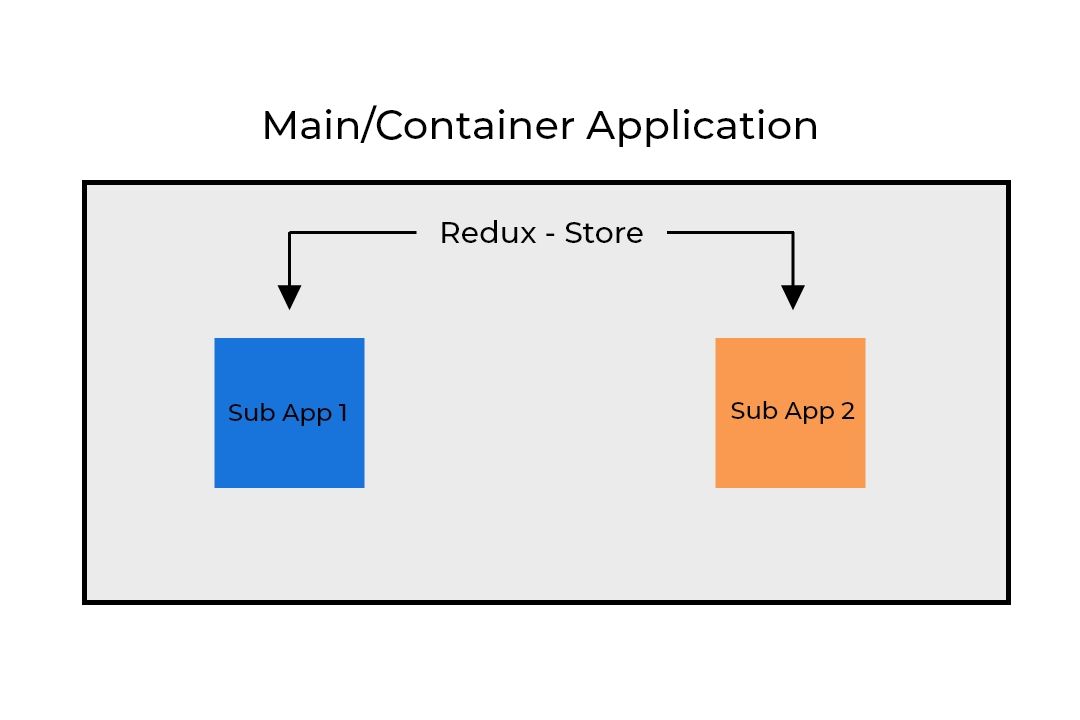
State Management Using Redux: -
Let’s discuss on state management using REDUX across the main and sub apps.
Let's go with below example to understand state management.
We have a main app, and two sub apps. We are creating a redux-store in main app and passing the store through props to the sub apps so that we can access the store in any sub application when integrated with the Main App.
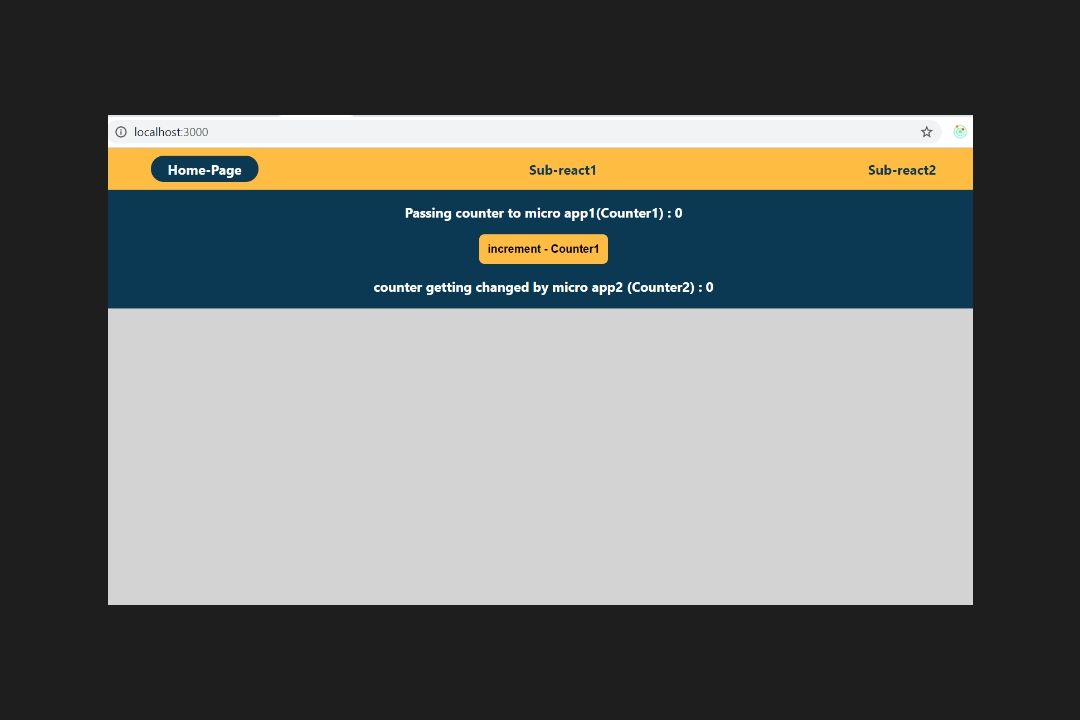
Main app: -
- Contains Header (Navigation Bar) which contains links to show sub apps once we click on the links.
- In main app let's have a Counter named as Counter 1 along with increment button which increments counter by 1 for a click.
- Let's have another counter named Counter 2 which will be changed by Sub-app 2 (will discuss later).
- The grey region in below image reserved to show sub apps. When we click the links in the header the sub app will be displayed in grey region.
Sub-App 1: -
- It displays the Counter1
Sub-App 2: -
- It displays the Counter 2
- It has an increment button that changes the value of Counter 2.
So, now we have basic idea on what we are going to achieve.
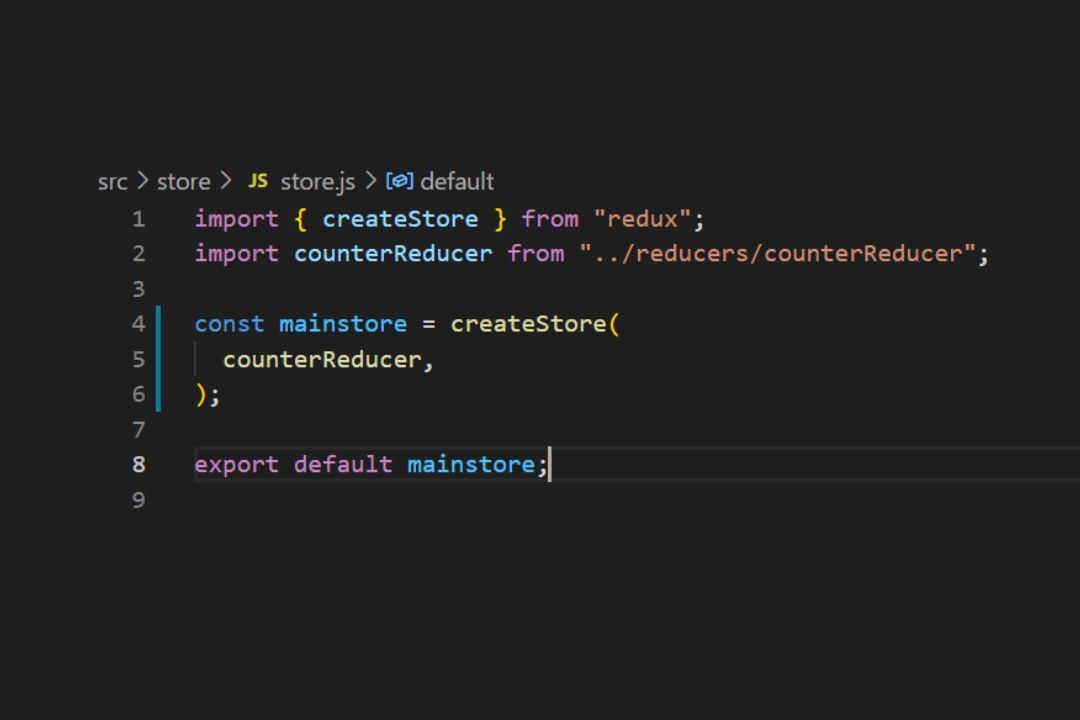
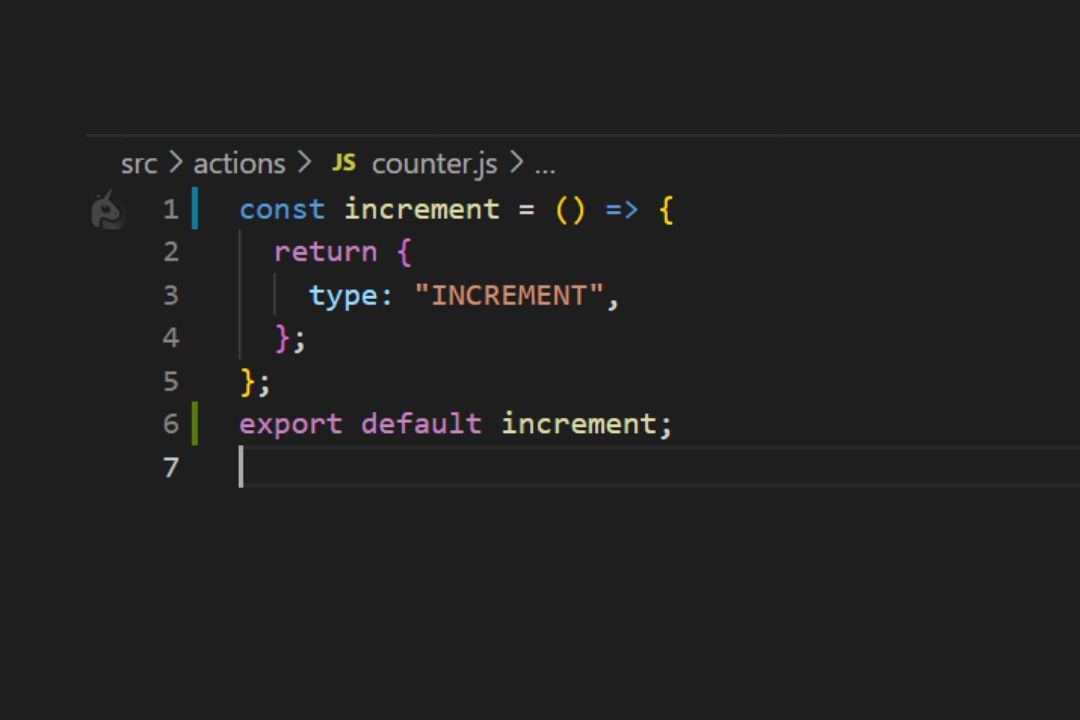
Now, Create a Redux-Store in main application. Implement basic counter with actions and reducers.
Main Store: -
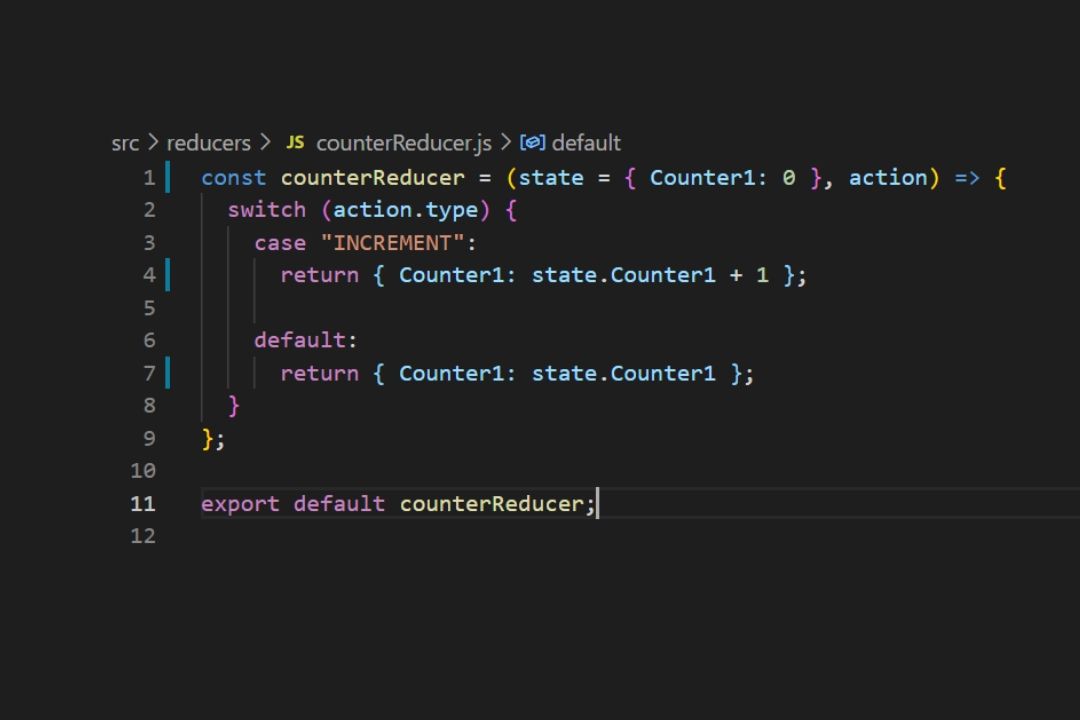
Reducer: -
Action: -
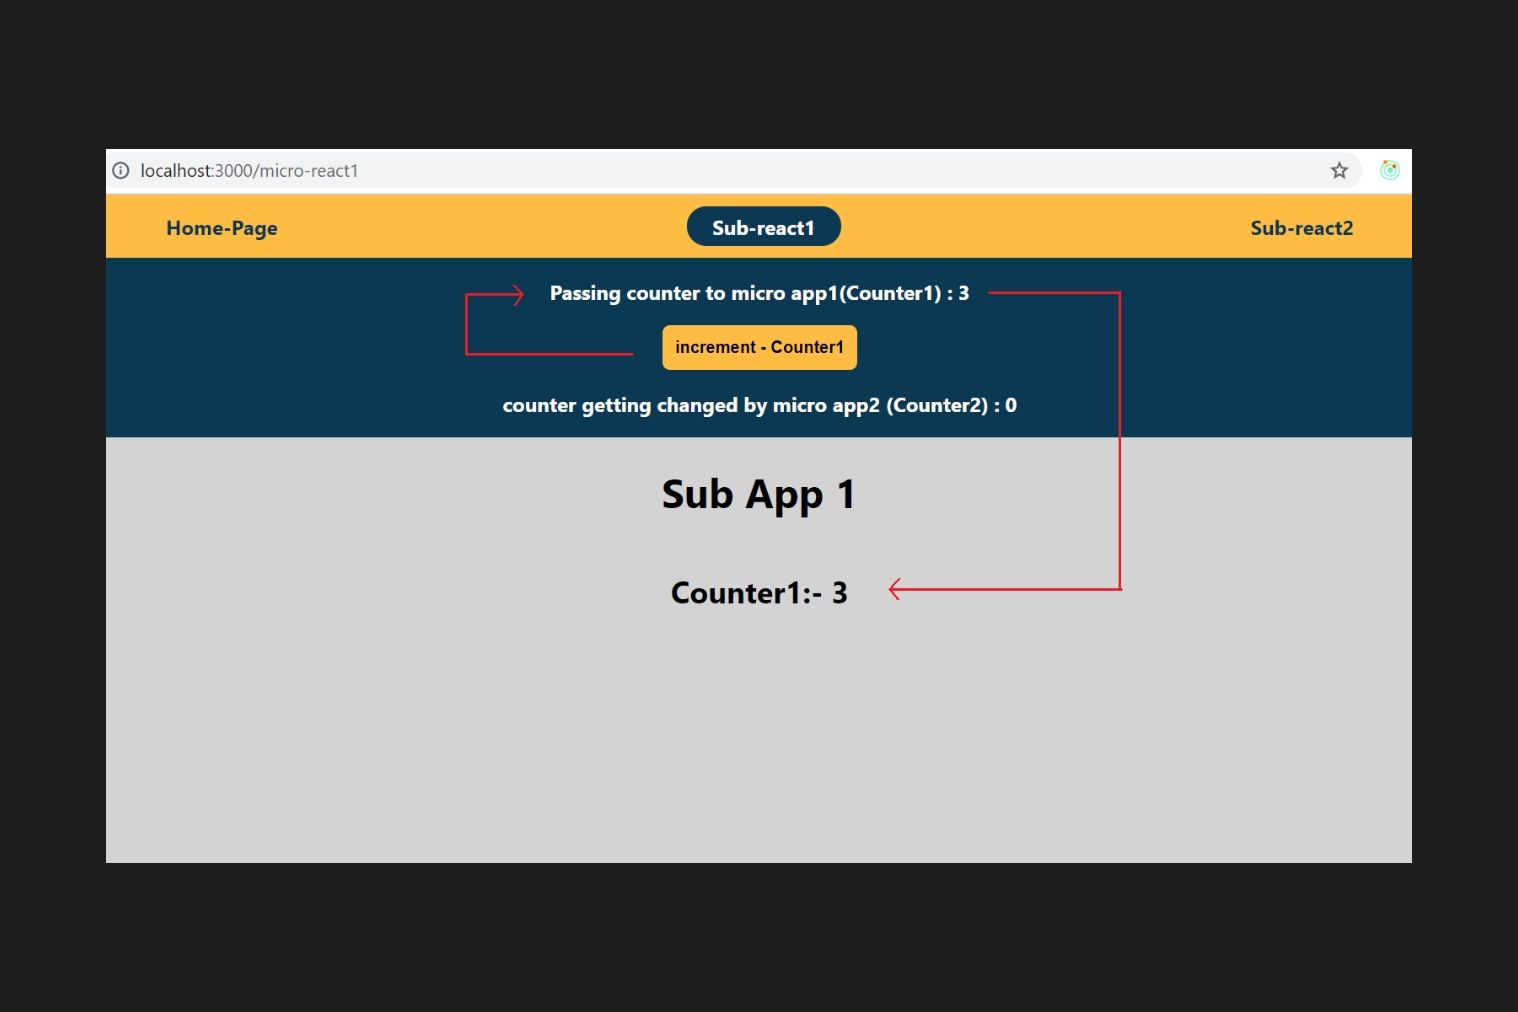
We can just retrieve the state variable, in our case we are going to display this variable as Counter 1 in Main app.
We have implemented counter which is working fine in the main app.
We need to pass this Counter 1 to sub app 1 and display there.
So, for that we need to pass this redux store to micro app 1 so that we can access the Counter 1 in micro app 1.
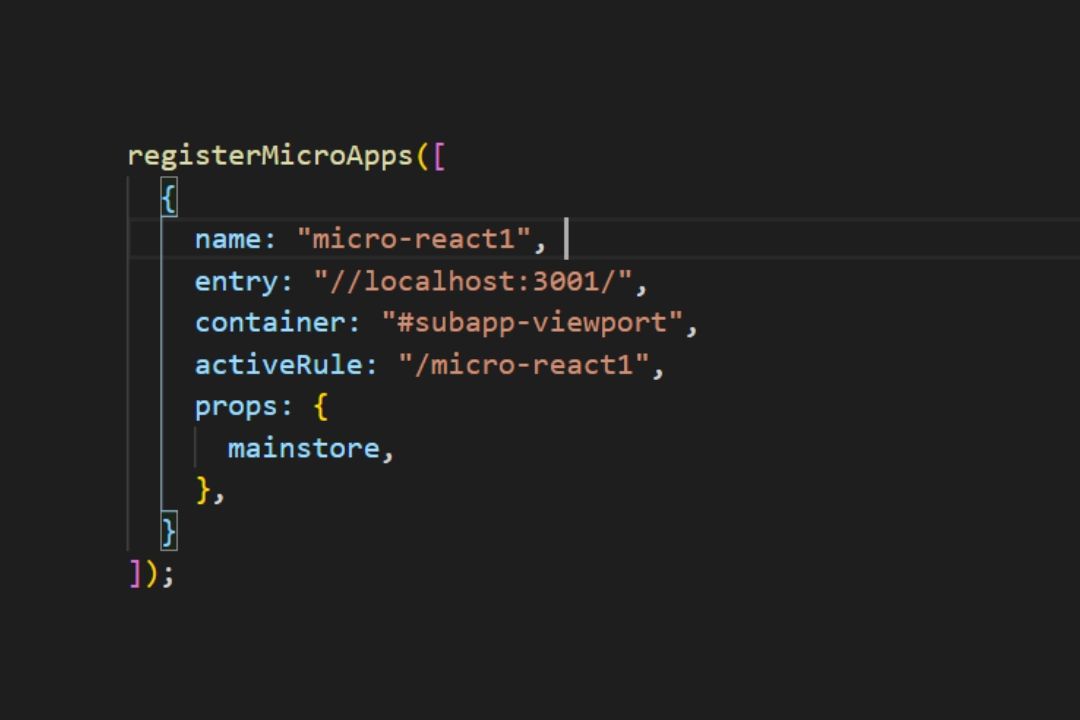
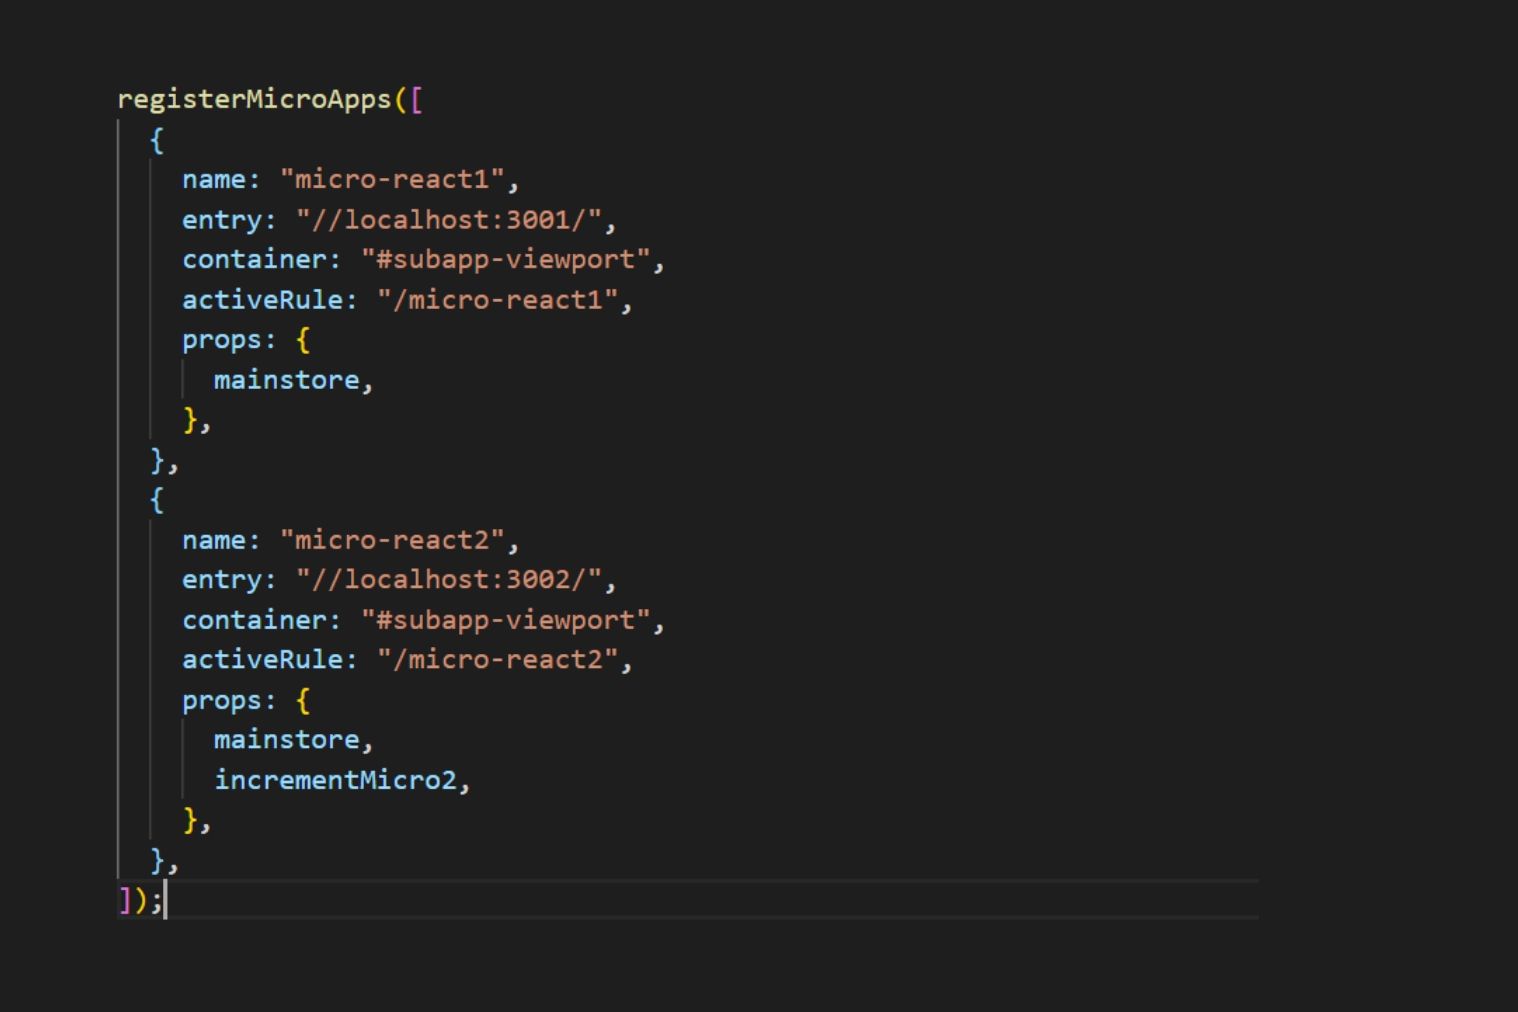
If you remember in the beginning, we have registered the micro apps in the main app using registerMicroApps() which we have imported from qiankun.
So, there we need pass the main store to micro apps as props.
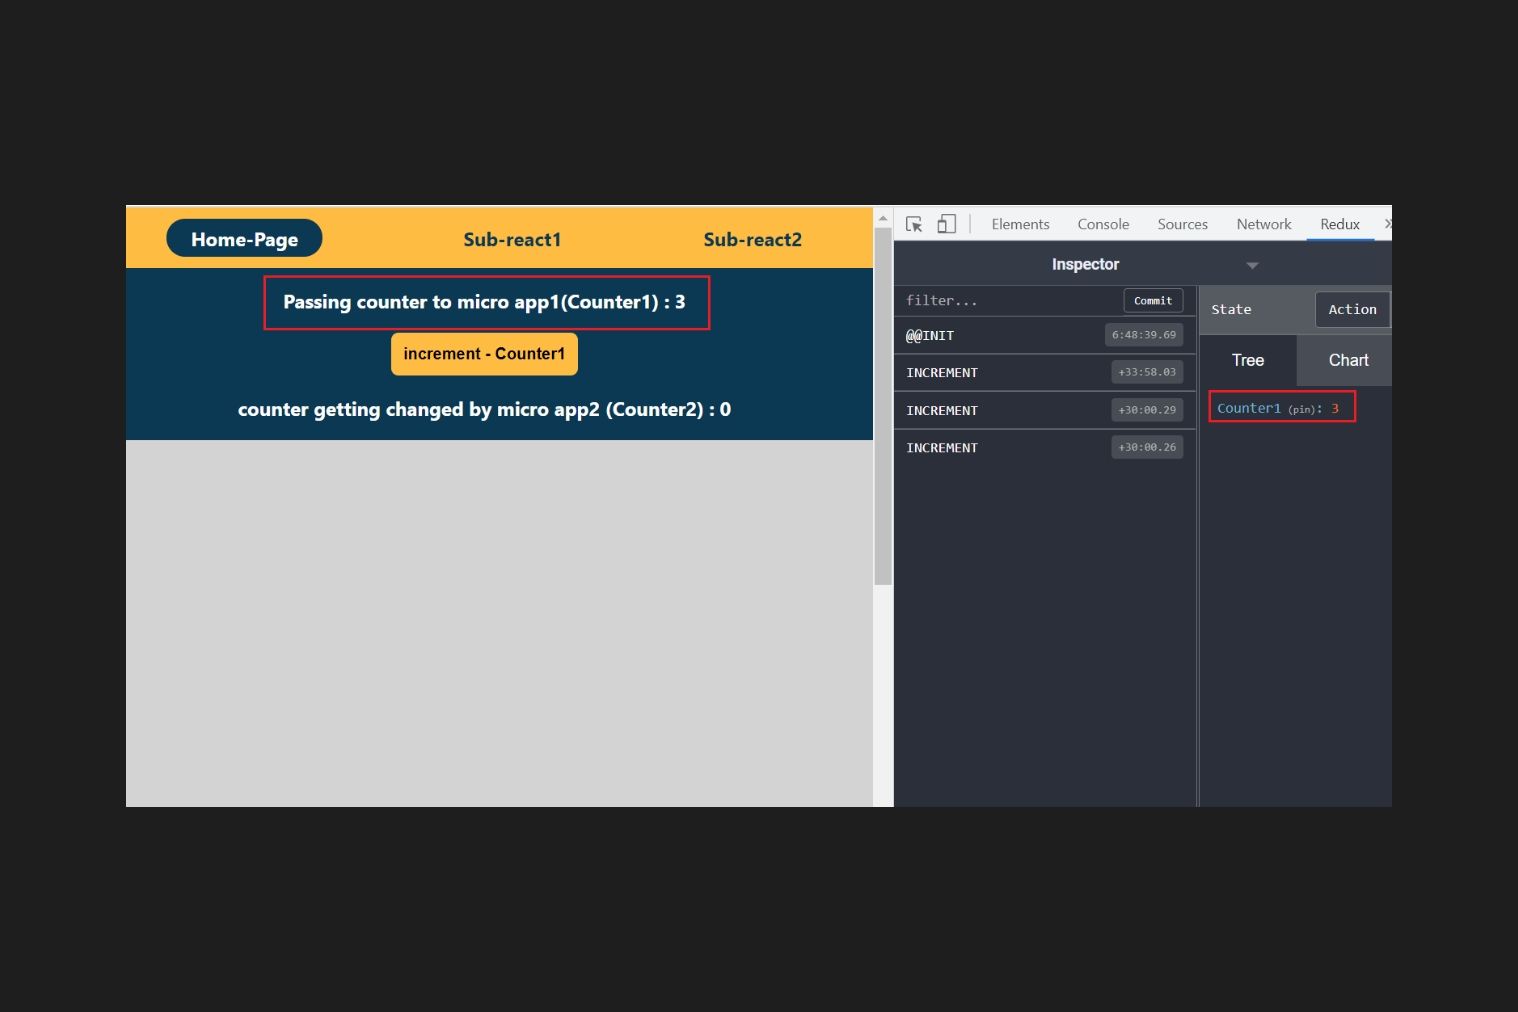
Now we need to access this store in micro app 1.
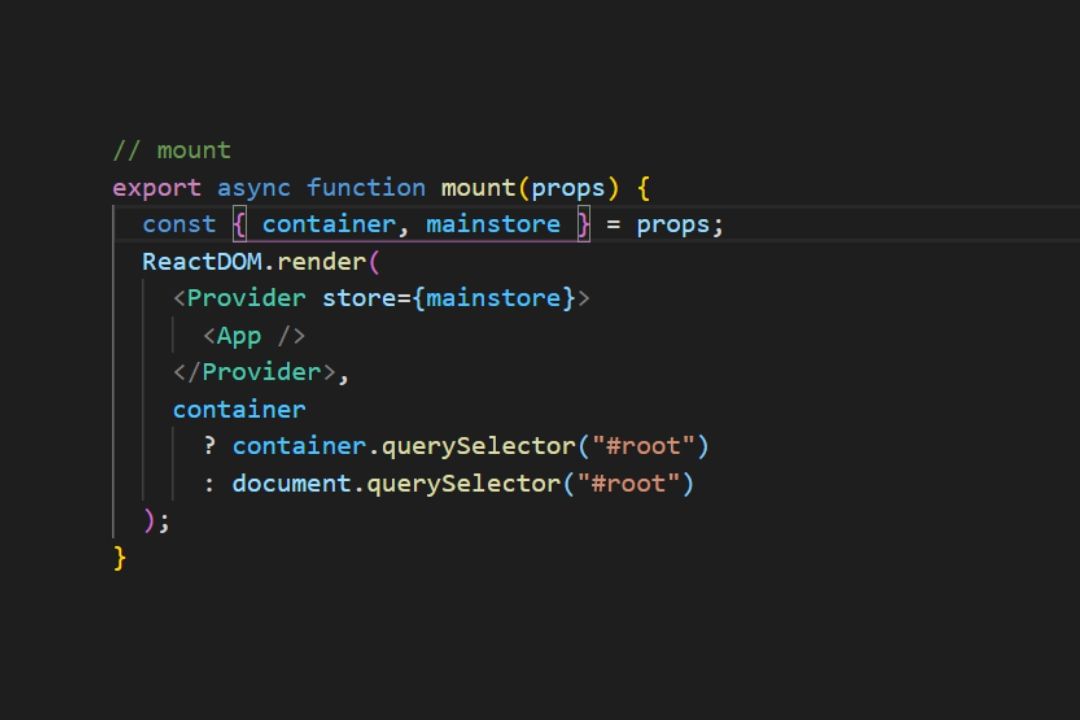
As we have passed the store to micro app 1. Now we can access the counter 1.
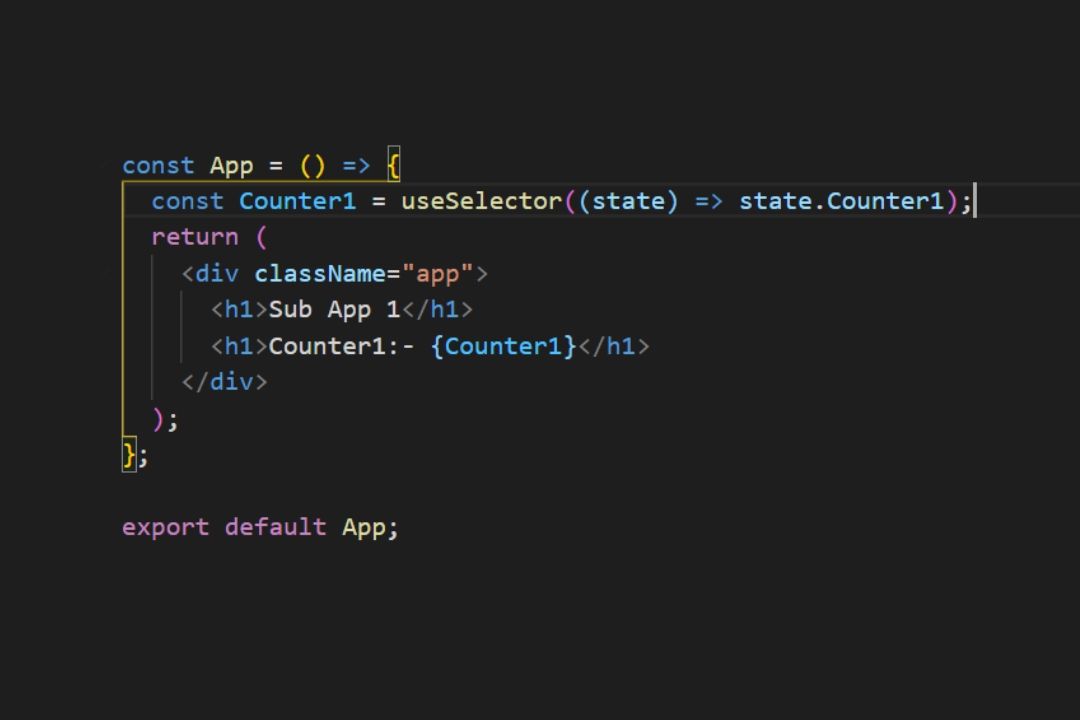
So, from above image we can see that we were able to pass the main store to sub apps.
In the same way create another counter named Counter 2 in main app.
Then, we will try to change the variable value from micro app 2.
To do that, while passing the main store as props and along with that, we are going to pass actions through props. We will dispatch the actions from the micro app 2.
Action for micro app 2 which is defined in main app: -
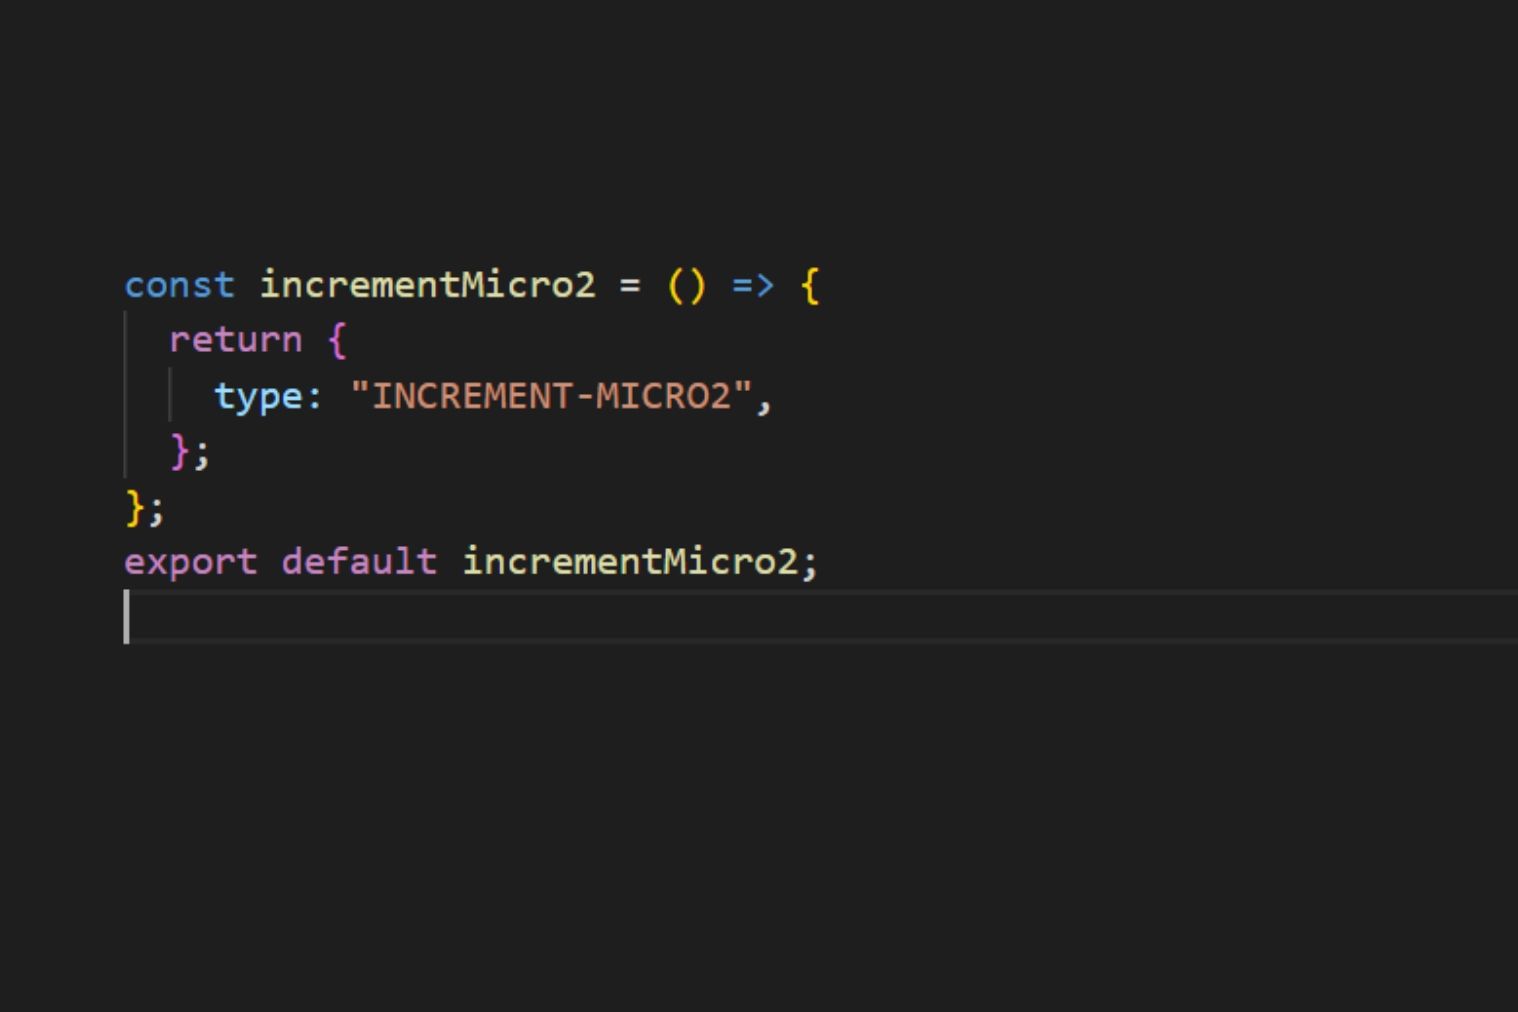
Passing the action to micro app 2.
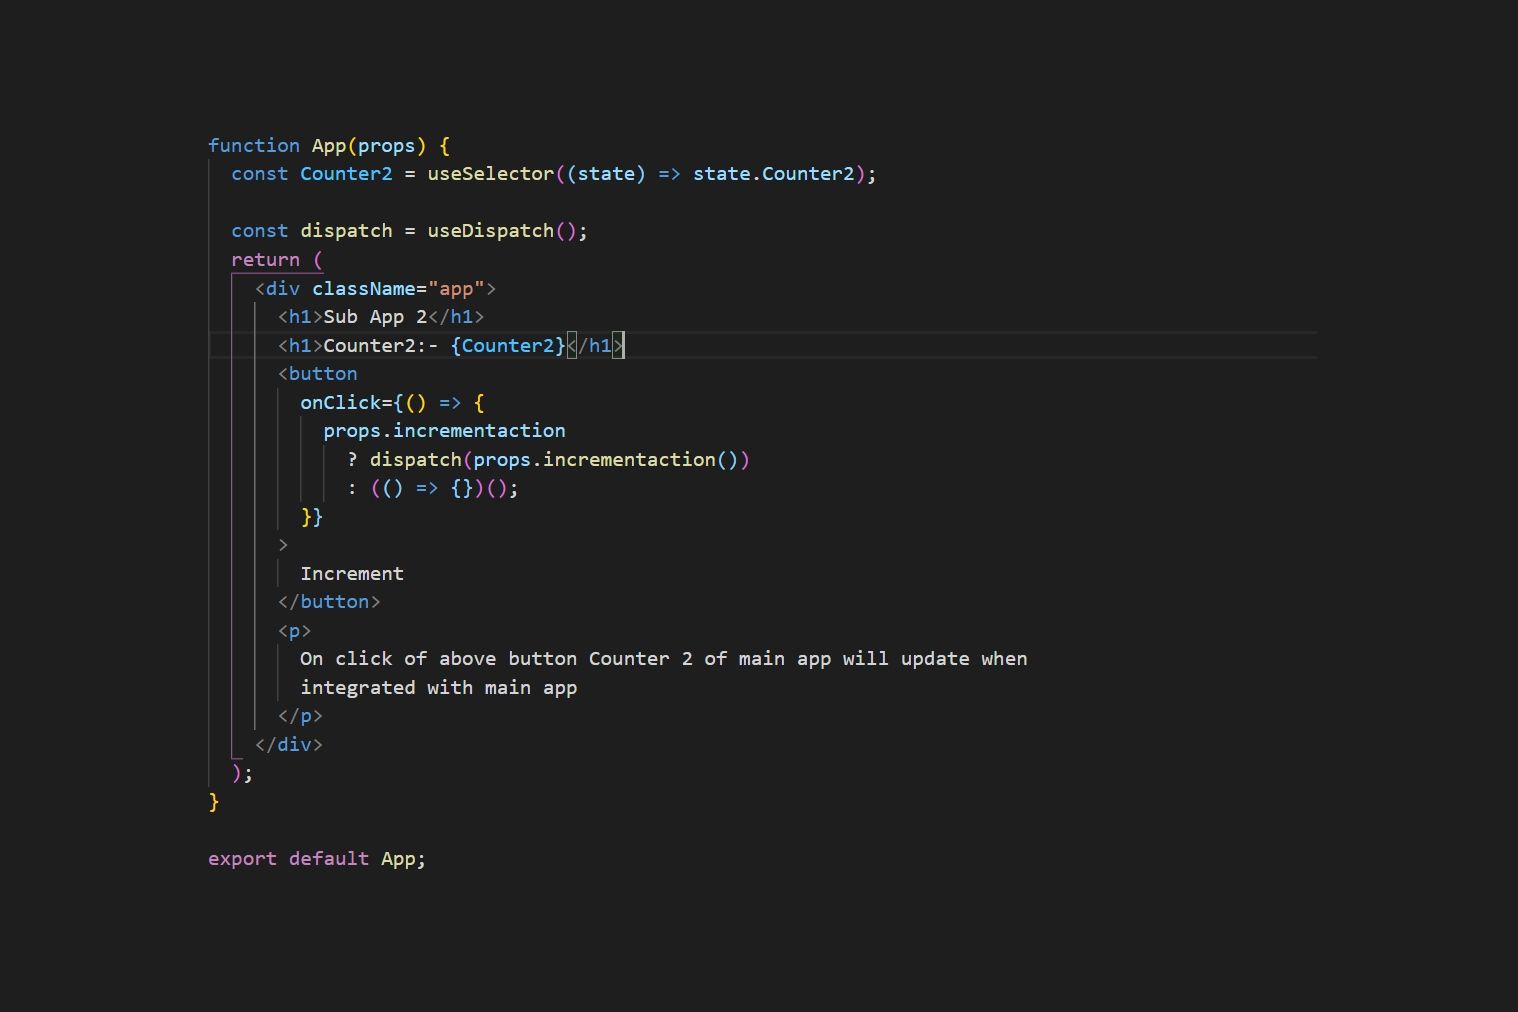
Access the main store and actions in micro app2.
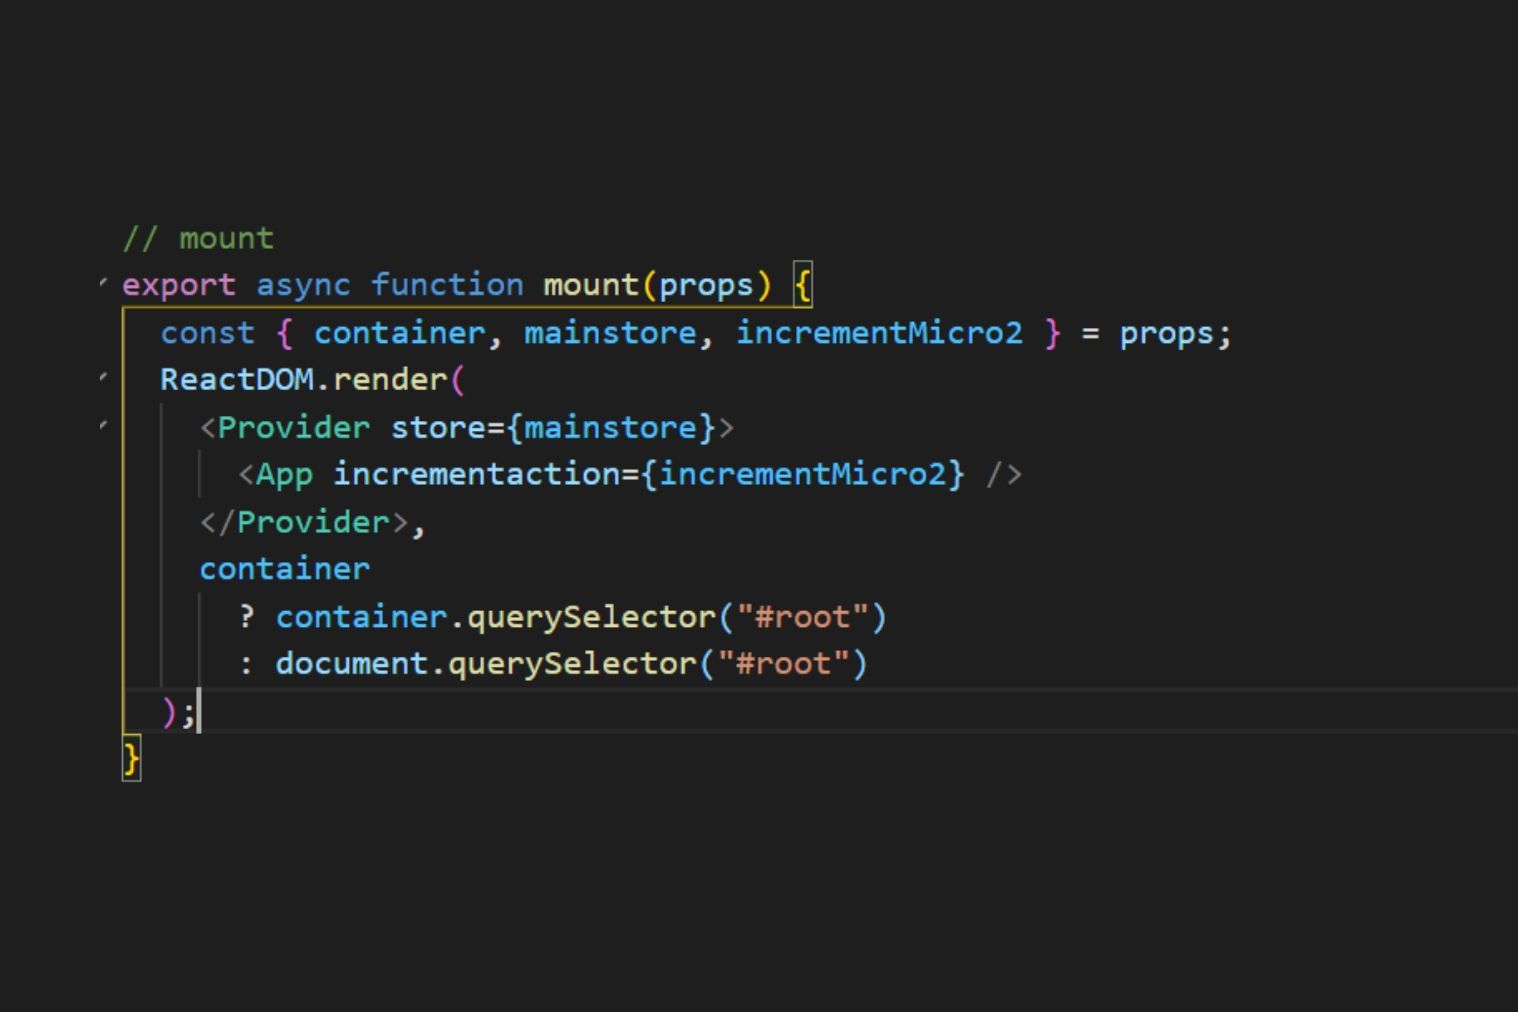
Dispatching the actions in micro-app2.
Micro app2 integrated in main app: -
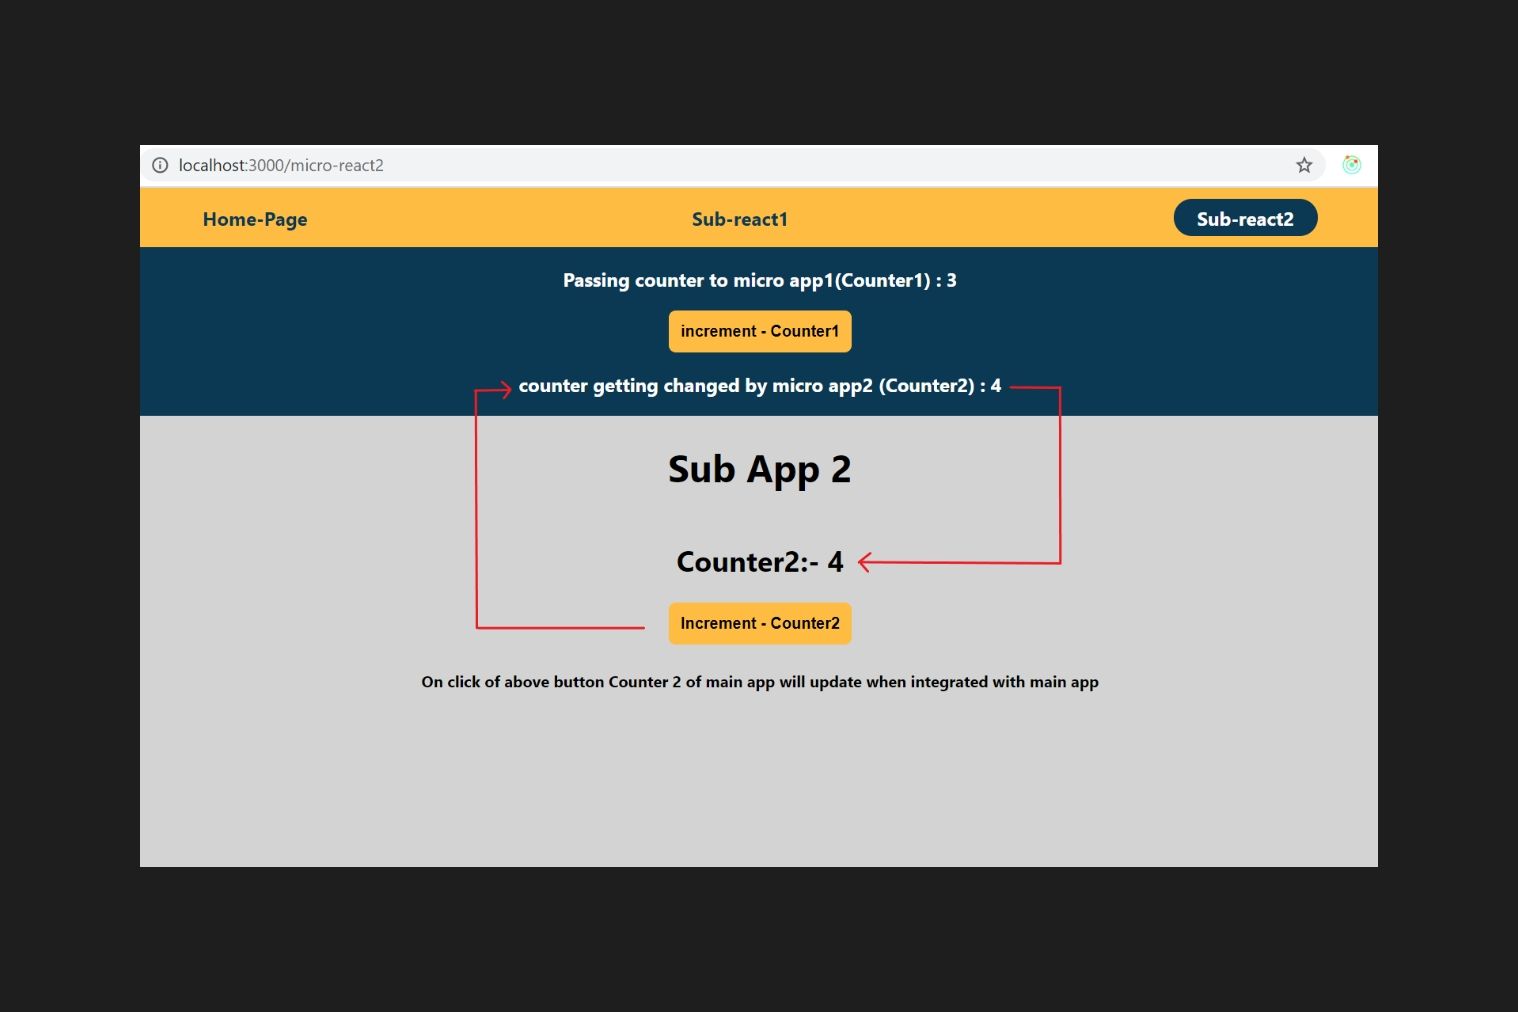
Now, we have successfully implemented micro-frontend architecture using Qiankun with a container app, and two sub application and we were able to manage state using redux state management across the apps.
How to Deploy?
Here we have two ways of deployment.
Approach 1: - The main app and micro apps are deployed to the same server (the same IP and port)
- If the number of servers are limited, or cannot be cross-domain and other reasons, the main app and micro apps need to be deployed together.
- In this case you need to deploy main app in first level directory, and all sub apps need to deployed in second or third level directory.
- Suppose if your main app deployed on https://example.com
You sub apps need to be deployed in second level directory like below.
Sub app 1: - https://example.com/micro-apps/micro-react1
Sub app 2: - https://example.com/micro-apps/micro-react2
Approach 2: - The main app and micro apps are deployed on different servers.
- If we deploy the main app and micro apps on different servers, the main is not allowed to access the micro apps across the domains due to cors policy.
- There are some ways to rectify this issue.
- You can forward all requests for a special path on the main app server to the micro app server, that is, a "micro app deployed on the main app server" effect is achieved through the
Nginx proxy.
For example, the main app is on the A server, and the micro app is on the B server. The path /app1 is used to distinguish the micro app, that is, all requests starting with /app1 on the A server are forwarded to the B server. - If you are using Amazon cloud front CDN or Netlify make sure to allow the main app to access the micro apps by providing Access-Control-Allow-Origin headers for the micro apps.
Demo: -
Here we are maintaining three different repositories for these three apps, developed and deployed separately.
For demo purpose we have hosted on Netlify, you can check below URLs.
Main app: - https://main-react-app.netlify.app/
Sub app1: - https://micro-app1.netlify.app/
Sub app2: - https://micro-app2.netlify.app/
You can also check the source code in below public repository.
Gitlab: - https://gitlab.com/fibonalabs/microfrontend-qiankun/
For official Qiankun Documentation you can refer below URL.
Qiankun official: - https://qiankun.umijs.org/